Thursday 3 December 2009

Possible Character Design Research

According to the brief of this project, the main thing we should keep in mind is that "Its impossible to put a pastille in your mouth and not chew. The fruit juice gets your saliva glands going in your mouth and the sugar coating requires instant crunching upon." After reading this, the first thing that sprang into my mind was "...What exactly happens to the fruit pastilles inside your mouth?" Naturally they get eaten, but what if the reason they're so irresistible is because the pastilles come alive to make it that way? I have no idea where this idea will go yet, or even if it can be developed into a full idea, but for now I like the thought of giving the pastilles character. I'm thinking the sugar coating could be some sort of protective shell for a juice-type creature living inside... So for now I'm going to look at liquidy, gooey, blobby, and droplet shaped characters to see if I can generate any further ideas.


References

To start off I thought I'd better take some good, close up photos of Fruit Pastilles and their current packaging so I can use them as references when creating their cartoon counterparts in Flash. I got as many angles and states of unwrap as possible just in case. Hopefully these will be helpful later on.


Wednesday 2 December 2009

Advertising Project

As of last week we have been given a new project brief, this time teaming us up with advertising students to create an animated advert for Rowntree's Fruit Pastilles. Since we only have three weeks to plan and complete this project, I'm rather worried about the short time scale... but hopefully it should prove to be interesting.

Wednesday 18 November 2009

Final Animation


Here's my completed animation as it would run without the clicking/interactive element. I will provide the interactive swf. file on disk since neither Blogger nor Youtube support that file format.

I added the extra frame just before the yelp and I think the slight pause it adds makes it look a lot better. Overall I'm pleased with how its all turned out, and I think it flows together well. Once the animation was finished I played around a little with colour and the paper effect, keeping the simple, mostly-white-with-only-patches-of-colour style of the 'There She Is!!' music videos in mind. I created a new layer in Photoshop and set the blending mode to Multiply so that the paper would still show through, then coloured in the eyes, nose, patches, tail, and ears in different shades of grey; then flattened the image and colourised it, giving it a pale blue hue. I quite like this effect, but it seems a little too obvious that it was done in Photoshop... I really want to keep the piece looking as hand drawn as possible, as though the character I've just finished doodling has suddenly come to life and started moving on its own, rather than me having spent a great deal of time carefully animating it.

I also tried deleting the paper background around the character to see if the contrast between the bright white background and the papery character would be a nice effect, but again, it just seemed to detract from the 'doodle coming to life on paper' feel. I also think the lack of paper background makes it look sparse and empty... I could create an entirely new background in Flash, but I feel the sharp vector images would clash with the nice roughness of the hand-drawn character... To be honest, I found myself really missing the way the paper background flickered as though moving, due to the light of the scanner. As plain and simple as it is, I think the paper is what makes this animation personal to me, and I'd like to keep that in tact. I also found an example of how having the background the same colour and texture as your character can work well to show the world they live in, even if that colour is white:


In my character's case, his world is the world inside my paper.

Below is the small test I did just with the run cycle to show the possibility, but I'm going to keep the final piece in greyscale with the paper background.

Yelp and Run Test


The final part of the animation before it loops back into the run cycle. I decided to change the plan from my storyboard slightly at this point, just because I felt like looking both behind and in front of him wasn't necessary. He's been watching the path ahead all the time he's been running, and the tumble would have carried him forwards past the point of clicking, so really its logical for him to only look behind. I also decided to take out the scene where he touched the 'screen' before freaking out, simply because I felt that by doing so, his reaction would seem really delayed. If he can see the person in front of the screen who clicked him, then he should be able to see them as soon as he turns his head to the front, not just after touching the screen. So instead I've drawn him catching sight of the viewer as he's turning back to face the right and yelping immediately in surprise. I think this more sudden action is much more convincing and amusing to watch, and after seeing how well it works in this test, I think I'm going to stick with it. The only thing I might add is one more frame just before the anticipation for the yelp... I think a slight pause is necessary to show him realising what he's seeing.

Standing Up Test


Here's the next part of the my animation, with the cat pushing himself up and looking behind him for whatever tripped him up. I wanted him to push himself up a little slower at first to show he's still recovering from the fall, then stand and turn around quite quickly once the confusion takes over. I acted this movement out myself several times while animating to get a good feel for how the weight should be distributed and how his body should arc as he pushed himself up. I also asked a friend to photograph me acting this out so I could use the photos as references.

Again, I had to adapt the poses for my cat's small, squishy body, so I tried to add subtle squash and stretch to the paws and feet. I'm really pleased with how this turned out; I didn't expect to get it right first time but the timing seems to work well, so I don't think I need to change anything at the moment.

Actionscripting

Now that I've got about 2/3 of the animation complete, I decided to try adding the interactive element to check everything will work okay before I finish. I will be using Actionscript 2 again for my cycle, since Actionscript 3 is still causing problems that we've yet to work out... But 2 is more than adequate for what I need to do now.

First I pasted the eight frames of my run cycle into scene 1, then added a second layer above it for my button. On that layer I inserted a new symbol (button) and used the Rectangle Tool to create a white fill box with no stroke, then set the Alpha of the white fill to 1%, making it practically invisible. I dragged it from my library onto the button layer and scaled up so it covered the main all of my cat except its tail, then inserted a new scene. On scene 2 I pasted the frames of the second part of my animation (the trip, fall, and tumble).

Back on scene 1, I opened the Actions box for the button layer and selected Global Functions. I then chose "On (release)" in order to make the button clickable, and then went into Timeline Control and added "Gotoandplay (1)" and then "Gotoandplay (Scene 2, 1)" to make the animation jump to the first frame of scene 2 after being clicked.

I then went back to layer 1 and opened the Actions for the last frame of the run cycle, then selected "Gotoandplay (1)" from Timeline Control to make it loop until the cat is clicked.

At first I had problems trying to get the second part of the animation running back into the loop once it had finished, but I eventually realised that Scene 2 doesn't need any actionscripting at all so can just be left alone. Pasting the run cycle after the trip/fall also helped the flow of the loop, and now its working really well! Unfortunately I can show the click test here since Blogger won't accept Flash files, but now that I've figured what actionscripting needs to be used, it should be easy to add last part of the animation to Scene 2 once its finished. The only flaw I can see now is that the eighth frame of the run cycle only seems to last for one frame instead of two, which looks a little odd while its playing. I think it must be because the loop action can only be added to the original frame rather than the extra one I inserted... So I'll try removing the extra frame and just pasting the eighth frame again instead.

Trip/Fall Test Complete


Here's my second attempt at the fall and tumble with the extra frames added. I think it looks a lot better now; the motion's a lot smoother and it looks about the right speed. My only concern is that it almost looks like there's too many frames where the body's supposed to fall... My character almost seems too light and floaty now. I think I'll try removing one frame from the initial drop into the tumble, and possibly one from after the tumble when the body hits the ground to see if it looks any better.


Here's the test again with the two frames taken out. I think it look much better now that the falls are faster, since it gives the illusion of weight.

UFO


This is the UFO I created in class when we were taught how to animate along a motion guide. To make it, I first set the stage dimensions to 500px by 300px with a frame rate of 12 frames per second, and filled the background with a dark blue. I then created the UFO as a new symbol, then used the Oval tool to make the planet and filled it with a Radial Gradient, using the Gradient Modifier to experiment with the spread of different colours. I made a new layer above the planet layer and dragged the UFO onto it from the library and resized it accordingly. I added a motion tween to the UFO for 40 frames, then added another new layer above it, on which I used the Oval tool to create a pale blue outline of a squashed oval around the planet. I locked the UFO and planet layers, then zoomed in and erased a tiny part of the oval outline near the UFO before changing it to a guide layer and dragging the UFO layer onto it in order to link the two. I dragged the UFO's center point to one end of the oval outline on frame 1, then positioned it at the other end of the outline in frame 40. Lastly, I unlocked the planet layer, selected the top half of the planet, cut it, and pasted it in place on a new layer above the guide and UFO layers to give the impression that the UFO is travelling around the planet. I found this to be a very useful and interesting way to teach motions guides, and I feel I could repeat the process should I need to for a project of my own in the future.

Trip/Fall Test 1


The next stage of the sequence is the trip and fall, which I've started from the eighth frame of the run cycle. I was worried that the jump from the clicked point in the run cycle to the start of the trip would be too obvious, but since the the four drawing formula is so fast, I'm hoping that no one will be able to notice. The trip was fairly easy, but I had to plan the tumble out a lot before attempting to draw it. I found this rather long-winded tumble tutorial on YouTube which I used as a reference to get a good idea of how controlled tumbles work. It takes her about two minutes to actually get round to tumbling, but once she does she repeats the movements slowly a few times, which I found very helpful. I made sure to tuck my cat's chin into its chest to make the roll smoother.


After watching how she finishes the tumble with her feet on the ground before standing, I realised that I'd need the feet to catch on the floor again to make my character come out of the roll and hit the floor, which I added in. I also made sure to over-exaggerate the body's follow-through motion to make it come up and start to flop over the head before crashing down. The tail's follow through is naturally exaggerated even more and is slower, since its much lighter than the rest of the body. However I think I need to add more frames into the roll, as at the moment its much to fast and doesn't feel like it has enough weight. Likewise, the body flips up and falls to the ground too quickly once it comes out of the roll, so I intend to go back and add some more frames there as well. I also think another frame or two is needed at the trip in order to properly anticipate the fall... And I don't like how the eyebrow changes expression at the end... it looks like its floating around the face rather than actually being a fixed eyebrow. I'll make sure to amend that when I go back to add more frames.

Run Test 2


Here's the neatened up run cycle with all the details added and the tail animated. The tail was rather tricky to move convincingly using the four drawing formula, since I needed it to flick up and down with the bobbing of the body, but at the same time if couldn't flick too fast otherwise it would just be a blur. In the end I managed to find a decent compromise, and I think it works quite well. I used and example of a cat run cycle as a reference for the tail positions, again from the Animator's Survival Kit.


On a separate note, even now that I've tidied up the line art significantly, I'm still really liking the slightly rough, pencilly feeling it has, as though the drawing of my cat has suddenly come to life and started moving on its own. I think that if I digitalised it fully by tracing over the frames in Flash, the sharp vector line would ruin this illusion... And while someone could easily argue that a character quickly doodled straight onto flash could also come alive and move on its own, I think it would be harder to believe because of how clean and crisp all the lines would be... I think its that "still a work in progress", sketchy feel that really brings it across, or at least that's how I feel personally. I'm also enjoying how the paper is flickering in the background as my character runs, almost as if the cat's movement across the paper is causing the paper to move as well. It may be an accidental side effect of scanning in each frame, but I think it looks brilliant while the clip is playing and it would almost be a shame to get rid of it... The background may just be blank paper, but because you can tell it is actually paper rather than just a devoid white space, it doesn't feel so empty.

Run Test 1


This is my first pencil test of my cat run cycle. Since I'm animating on paper by hand, I'll be scanning in all the frames individually and saving them in Photoshop before importing them into Flash. The Flash file is set at 24 frames per second, so all frames will be doubles.

I kept it quite rough to begin with and didn't bother adding all the character details like the patches and whiskers, since it saves time and I can add those later once I've ensured the animation works. I also left out the tail since that will need to be animated separately to the run. (I need to do research into the movement of animal tails before I can draw it convincingly) I wasn't really sure how to go about animating such a small character running fast, especially since the cat's legs are so wide from its stuffing which makes them overlap a lot more than thinner legs would. I know easily definable poses are essential in animation, but at the same time I feel a thinner cat would lose its squishy, rag-doll, plush toy look, so I really want to make the run feel convincing. While reading through the Animator's Survival Kit in search of run references, I discovered the that the four drawing run is best suited for small characters with short legs like mine, since it takes fewer positions for each stride to look convincing in less time than a taller character, because the positions all overlap.


I tried to vary the the poses slightly on the downward contact position of the run like the book suggested (to help the viewer read the two legs separately), but I didn't really like the idea of my cat just holding his arms out in front of him while running, so I decided to adapt the arms so they swing back and forth like they would for a taller character. I used the arms swings from a five drawing run formula on another page as reference for this, though I had to be careful of the spacing and made sure they worked as I went along by always flipping my paper back and forth.

I also tried to make the cat's feet squash slightly more when in contact with the ground to show his weight and to again emphasise how soft he if really. Overall I'm really pleased with how the run turned out! I was afraid it would be too fast once I'd got it playing on Flash, but it seems to be just the fight speed for what I want at the moment, since I want the kitty to be running in fear and confusion. Now I can add the rest of the detail and concentrate on animating his tail.

Storyboard

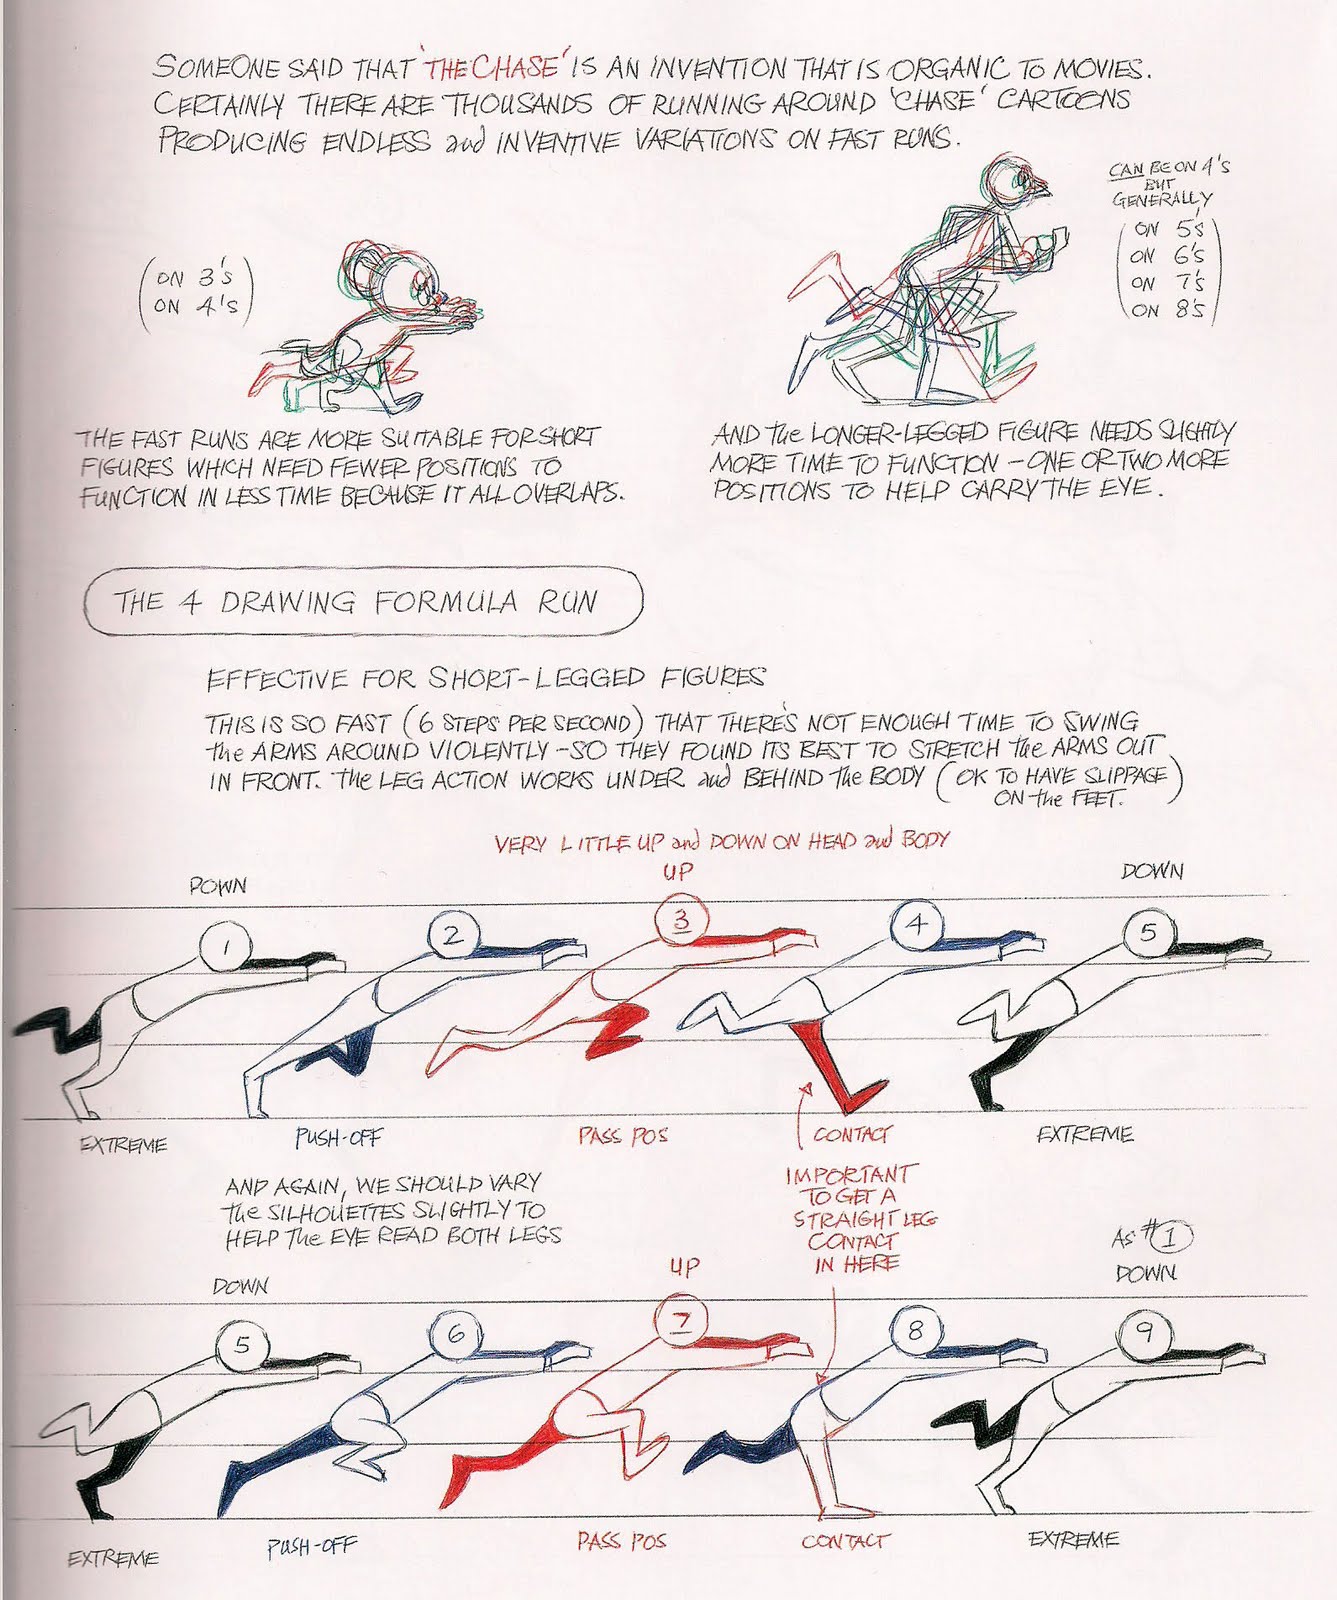
This is my storyboard for my 5 second cycle animation. My character will start off running, then trip when clicked and fall into a tumble/roll before landing hard on the floor. He'll then push himself up and look left and right for whatever tripped him, then look to the front and discover the 'wall' (the computer screen to the viewer), which he'll test. By doing so he discovers something/one is there watching him, so he yelps/jumps in shock and runs again, freaked out, allowing the animation to loop back to the beginning. I didn't just want a normal fall because I felt that would be too boring and not comical enough, so a roll should be much more exaggerated and interesting to watch. I'm hoping this is a pretty fun idea (it feels fun to me!), so I'm looking froward to animating my clumsy kitty~

As for how I'm going to animate it, I've decided I'm going to draw it by hand on paper rather than straight into Flash. After experimenting on Flash and trying to draw a decent rendition of my character using my Wacom, I've discovered that I'm actually very bad at drawing with graphics tablets... I'm sure I could get better with practice, but we don't have a great deal of time and I doubt I'd ever be able to get that degree of precise control that I can get drawing directly onto paper. I want to focus on making this animation as smooth, consistent, and convincing as possible rather than just making something brightly coloured and vectorised but not very well animated on Flash. So for now I intend to work on paper and scan the frames before importing them into Flash. I may try to digitalise them more later... but it depends on how the style of my animation develops in my head as I'm drawing it.

Character Design

Naturally since I want my character to be a plushie cat, I've been looking at a lot of plush toys as references, some of which can be found on my mood board. But in particular I want my character to be a rather old, worn looking toy that's been around for years and played with a lot (and damaged in the process). So rather than a modern toy, I decided to look more at traditional teddies and rag dolls, toys with patches that are imperfect. But even thought I want it to look like its been around for years, I don't want it to look old in personality... In its mind it hasn't aged, so it can still come across as cute and innocent, despite the wear and tear. My idea is that a cute toy can look even cuter if its a bit worn, since then it'll win the sympathy vote with the viewer because its not in the best condition. I want my cat to be a little forlorn looking... So I looked at plushies with obvious stitching flaws or patches to start with. The first being the C'mon Corsa mascots.


The Comfort fabric softener's mascots also show great stitching and different patches of cloth making up hair and faces, which I thought could be useful.I then remembered the Blue Nosed Bear and his friends all have patches and are usually a little sad looking or seem bewildered, making them look adorable. Their designs are typically traditional, but still very sweet and good for


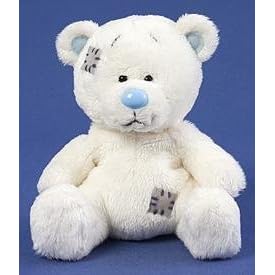
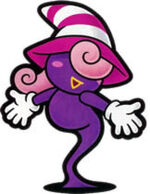
And here are some other cartoon cat references that I found useful or liked the shapes of:

I especially like the glued on eyes for the Gatomon plushies above... mostly because they're large and have light spots which can be used to show where the character's looking, plus they're black with a white 'pupil' rather than the usual white with a black pupil. I can imagine my character having one big eye like that and one smaller one which is the opposite in colour... Perhaps because its original eye was lost somewhere and that was the only replacement its owner (or its owner's parent) could find.

Here are the rough ideas I sketched after looking at all my research:

My notes on what I thought of each idea are written on the page... hopefully they're readable if you click on the scan to enlarge it. I liked the bottom two best, but since I'm going for cute and pitiful, I didn't think the drawing on the right would be quite suitable on account of it looking rather sly and haughty... Plus as much as a love that curved, crescent moon shape while its laying down, I don't think it'd work standing on two legs. So in the end I decided to go with the left drawing which is much cuter and more rag-doll like, which is what I was aiming for. I incorporated the patches and different sized eyes from the references, and got the idea to tie a knot in its tail to make the tail look more like an old strip of cloth, and to make its whiskers bent. I'm quite pleased with the design and I like it a lot. Below is the refined version with some expression experiments to get an feel for how the character will react to things. I exaggerated the ears to make them much larger so the can be used along with the facial expression to convey emotion. Flat ears are a great way of showing sadness, and are perked up ears for surprise or fear.

Wednesday 21 October 2009

Masking and Interactive Buttons


A really simple star mask I did to practise masking in class... I made it by creating two layers, the bottom layer containing the image and the top layer containing the motion-tweened star. I then selected the 'Mask' option in the top layer's Layer Properties to convert it into a mask layer. I selected the 'Masked' option for the bottom layer.


A week later we were taught how to make interative buttons, using the the previous masking experiment as an example. I didn't have the previous file with me at the time, so I quickly made a new mask using the same theory but with a different image. To create the button, I went to Insert > New Symbol, then chose the behaviour as a 'button'. I used the PolyStar tool to make the triangle 'Play' button, then changed the colour for each of the Up, Over, and Down states. In the Hit state I made a rectangle over the button to define the active area. I then dragged the button onto a separate layer in the scene.

Next I selected the button and opened the Actions window, then chose "On release", and "gotoAndPlay (1)" to make the mask play when the button is clicked. Finally I selected the final frame in the mask layer and added the "Stop" action in Timeline Control to make the movie stop at the end rather than loop back and repeat. This is my first time using any sort of Actionscript, so as simple as this is, I still found it rather confusing at first. But now I think I've got my head around it, and I look forward to learning more types of actions and implementing them in my own cycle animation.

Mood Board

Here's a photo of the concept/mood board I made for this project to help with my character design. I printed out my favourite elements of my research and tried to keep the 'cute but simple' style theme showing. Its stuck up on my wall as we speak; hopefully it will inspire me.

Further Research

During my search for anthropomorphic feline inspiration, I looked at many of the usual cartoon suspects such as Top Cat, Felix the Cat, and even Blaze the Cat and the other Sonic the Hedgehog characters, but they just felt too... traditionally cartoony. The Sonic characters are great examples of all kinda of creatures being given a human twist, but at the same time you can tell that they're supposed to be real animals (or at least 'real' in the sense of their world) rather than toy characters. They're also very detailed and stylised, which made me think that I might be better off looking at the Sonic plush toy merchandise rather than the official art, so I can observe how the designs have been simplified for the toys.


The Sonic characters also gave me the idea of possibly having a plush human type character with animal characteristics rather than just a straight plush animal. I found an animation while scouting YouTube for references which is a good example of this, as both characters appear human but have animal ears and tails. I think its a nice idea, but I'm not sure its the most interesting character design choice... (Though it works well in the animation) I think I'll probably continue down the plushie cat path for now, but its a nice alternative to explore. But even if the character designs didn't prove to be as helpful as I initially thought, the style and feeling of the animation throughout more than make up for it.


"Draw With Me" by Mike Inel.

I love how sketchy and hand drawn this animation feels... even when the characters aren't moving, each frame is sketched slightly differently to give the illusion that they're never still which is something I feel I'd like to incorporate into my work... I also really like how empty the background is. He never really shows anything other than the characters and the glass wall, giving the impression that they're alone it the world, yet the empty background never actually feel empty... I suppose the colours and glowing light balls help that, though it makes me wonder if paper could create a similar feeling.

I also found a series of five short Flash animations created by Sambakza called "There She Is!!" which I found to be a great help. Not only do they demonstrate excellent timing to the music and lyrics of their chosen songs, but they're also cute, funny, and have a simplistic, cartoony style that works really well. Most of the characters and settings are shown in just black and white with only certain things coloured, like the green scarf the cat wears; and backgrounds such as the sky often look like a wash of blue water colour or crayon. I might consider using this kind of style in my own work later on, perhaps just colouring my cat's eyes or ears to make them stand out. I've posted the fifth (and last) video in the series as an example because I think it has the best animation of the five, as well as a nice example of a walk turning into a run near the beginning, and the cat tripping over at the top of the stairs which could be used as references.

Research and Ideas

When I heard that the five second animation project would include some sort of interaction with the viewer, I immediately thought of what the character's reaction would be to an outside presence invading their world, rather than just continuing with a different action as though they haven't noticed the click of the mouse. I love the idea of breaking the fourth wall and artists/authors meddling with their characters' well fare as they see fit, sometimes just for their own sheer amusement... I guess its my evil side, but the idea of a character's shock and confusion as they're suddenly controlled by an outside force always makes me smile. While I've always had this sort of idea in the back of my mind, I first thought of it properly in terms of an animator messing with his/her animation after seeing this student film by Don Hertzfeldt. Some of the content is a bit nasty and crude for my liking, but I still think the overall concept is clever and well done.


So I decided I wanted to cause something amusing to happen to my character by clicking it, most likely for them to trip and fall in a comical fashion, since the brief says the cycle should include a walk of some sort. In order to get the most out of the situation, I believe the character needs to have a cute design... after all, its not as fun to be mean to a mean-looking character. This lead me to think of toys and stuffed animals, since children play with and control the actions of their toys in much the same way that an animator controls the movements of his/her model or drawings, plus all plush toys are made to be as adorable as possible. I started with the stuffed animals on my bed at home as reference points; those being a bear, a leopard, and a dragon. I felt the dragon was too complicated to simplify into a nice design, and the bear (while ideal) just feels too normal, since bears are the most common plush toy... That left the leopard, which gave me the idea of a cat and how cats tend to paw windows when they want to get inside. I thought this could be a nice action to animate, as though the character has just realised there's an invisible wall (the screen/paper) blocking him/her from the unknown force meddling with his/her life. So I next did some research into how cats can be simplified and animated, which lead me to two animations in particular: the first being an advert for Felix cat food, depicting a cat fairly realistically. The second being a fun little animation called "Simon's Cat: Let Me In", which exaggerates the cat's antics and gives it human-like characteristics without making it appear human in design.


Watching these really made me like the cat idea, and I love how simple and effective the design for Simon's cat is. But at the same time, I want my plushie cat to be more human-like and run on two legs so it can trip, so I next I'm going to look at examples of anthropomorphic cats in animation.

Ball Bounce


A bouncing ball I made to test motion tween in Flash. I tried to add squash and stretch principles to the ball when it hit the sides of the frame to make it seem more realistic... but I think the timing's too slow for it to look convincing. Nevertheless, it was a useful experiment and I think I feel confident using shape tweens now.

Shape Tween


A simple shape tween we were shown how to do in class. I made a yellow fill square in keyframe , inserted another blank keyframe at frame 24 and made a green fill circle on the opposite side of the stage, then simple added a shape tween. I was surprised at how easy it was to do; Flash certainly seems to make some things a lot simpler. In a way I find it similar to Photoshop, so I'm hoping I'll pick it up fairly quickly.

My Walk Cycle


This is my version of the basic walk cycle which we were set for homework. I decided I wanted to try animating a full character rather than just a pair of legs, since I wanted to apply weight and timing to the walk. I wanted the walk to be happy and a little bouncy, so I chose a young girl character, keeping her as simple as possible so as not to over complicate things with clothes and hair. I used this page from the Animator's Survival Kit as a reference for the foot movements, arm swing arcs and for the rise and fall of the head/body:


I also tried to make the hair bounce up and down a little with the steps as shown above. While the timing's not perfect, I'm still quite pleased with the result as she seems to walk quite smoothly and the bounce in her step does show. I drew the frames on paper first, then scanned them and imported them into Flash to animate them, which is why the background looks so grainy. I also had to overlap the images to make the walk cycle (since I drew her moving across the paper rather than walking on spot), which is why the line of the paper edge appears half way through.